How to Install a Car Rear View Camera
Share
How to Install a Car Rear View Camera: A Step-by-Step Guide
In modern times, rear-view cameras are increasingly becoming more important than an option. No matter if you're an experienced driver or have just obtained your license, ensuring that you back up safely is vital. A rear-view camera provides more visibility, removes blind spots, and may help prevent accidents. The greatest benefit? You can put one in place by yourself and not break the bank. This is a step-by-step tutorial on how to set up an auto rear-view camera with the expertise of a professional.
Why Install a Rear View Camera?
Before diving into "how," before we get into "how," let's briefly quickly review the "why." Installing a rearview camera can provide a number of advantages:
- Improved visibility when reversed, particularly in tight spaces
- More security for pets, pedestrians and vehicles
- More precise alignment when parking
- Increased value of resales on vehicles
If your vehicle doesn't include one, putting in this piece of technology can dramatically improve your driving enjoyment.
Tools and Materials You'll Need
To begin to start, gather the following items:
Essential Tools:
- Screwdrivers (Phillips and flathead)
- Crimper and stripper of wire
- Drill (if required)
- Electrical tape
- Multimeter (for checking voltage)
- Zip ties
Required Materials:
- Rearview camera kit (camera, monitor, cables, etc.)
- Video cables and power cables (usually part of the kit)
- Fuse tap or an inline Fuse holder (optional to power source)
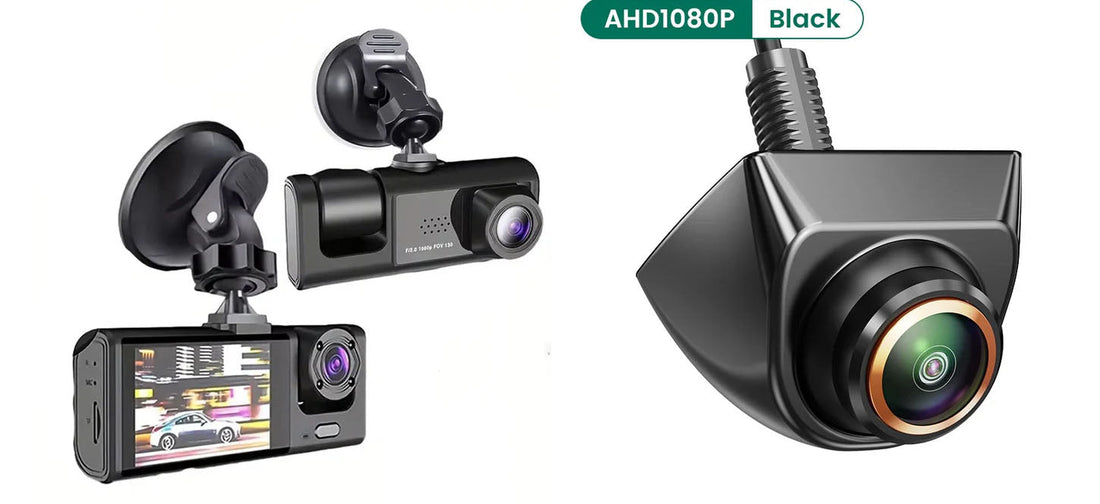
Step 1: Choose the Right Camera for Your Car
Cameras aren't all alike. There are three types of cameras:
- License Plate Cameras are easy to set up on top of the plate of your license.
- The surface-mounted cameras offer adjustable angles; however, they require drilling.
- Flush-mounted cameras are sleek; however, they require more effort and permanent changes.
When selecting a camera, take into consideration the design of your car, your level of comfort using tools and whether you prefer wireless or wired transmission. Wireless systems provide better stability in signal quality, while wireless systems are simpler to set up.
Step 2: Plan the Installation Route
Before you make any connections or cuts before making any connections or cuts, sketch out the layout:
- Determine the location for mounting your camera (usually close to or just above the license plate).
- Pick the ideal spot for your monitor--dash or windshield or the rearview mirror.
- Create a plan for the power and video cable route between the video camera and the display.
This prevents unpleasant surprises and also ensures that you have the right length of cable.
Step 3: Mount the Camera
License Plate Camera:
- Take off the rear license plate.
- The camera bracket should be placed to either side or over the plate.
- Use existing holes when possible or drill holes from scratch with care.
- Place your camera and plate onto the vehicle.
Surface or Flush Mount:
- Place the mount in the desired spot.
- Make the holes you need.
- Adjust the angle of the camera.
- Secure the area to stop the entry of water.
Check that you have the camera level centered to ensure the most optimal viewing angle.
Step 4: Connect the Camera Wiring
This is the toughest part, but make sure to adhere to these steps:
Power Connection:
- Find the wires for the reverse light within your vehicle's rear taillight assembly.
- Please make use of a multimeter to determine the right wire (it will only work when reversed).
- Strip and connect the red power wire of the camera to the opposite light wiring.
- Connect the black wire to an unpainted, clean metal surface.
Video Cable Routing (for wired systems):
- Attach the cable for the video to your camera.
- Pass it through the interior of the car toward the dashboard.
- Put the cable into the carpet or trim using the trim removal tool or flathead screwdriver.
Wireless systems are easy to use. Simply attach the receiver to your camera and then route the power in the same manner.
Step 5: Install the Monitor
The configuration of your monitor is based on the model you've selected:
- Dash-mounted display: Stick it using the adhesive mount mount.
- Monitor mounted on the windshield: Use a suction cup holder.
- Mirror monitor for rearview: Clip it over the mirror you have already.
Powering the Monitor:
- Connect the power cable of your monitor directly to your socket for the cigarette lighter socket or
- Make use of the plug for a fuse to connect to an ignition switch to create a neater appearance.
- The video connection or the receiver is wireless (depending on the system you use) on the screen.
Step 6: Test the System
Before taking everything apart:
- Get the car started.
- Shift into reverse gear.
- If the monitor is wired properly, it should display the view of the rear camera.
- Make adjustments to the camera's angle if needed.
Check that the image is not blurred or distorted and that all lines (if there are any) are aligned correctly.
Step 7: Secure and Tidy Up
- Make use of a zip tie to fix loose wires.
- Tape or cover wires that are exposed using electrical tape.
- Install any trim panels that you've removed.
- The excess cable should be neatly bundled and stored away.
A tidy installation does not just look better, but it also helps prevent future problems caused by wires being snagged or damaged.
Step 8: Customize Your Display (Optional)
Some cameras with rear-view capabilities include the following choices:
- Grid lines are A great way to align parking.
- Brightness/contrast Adjust to improve visibility.
- Image reverse: The image is flipped in the event that the orientation is not correct.
Go through the user's manual for your specific system and investigate these features.
Step 9: Maintenance Tips for Your Rear View Camera
As with any technology rear-view cameras, they require some attention:
- Cleanse the lens often using a soft cloth.
- Avoid direct contact with high-pressure car washes onto the camera.
- Verify wiring connections every few months.
Keeping your system in top condition ensures that it is working at the time you require it.
Conclusion
Installing a rear-view camera is among the most effective DIY improvements you can make to your vehicle. It could take a few hours, but the benefits are safety, ease of use, and peace of mind. With the right equipment and a bit of perseverance, you'll be driving (and turning) like an expert in the blink of an eye.
FAQs
1. Do I have to install a rearview camera in any vehicle
It is possible, and most vehicles are equipped with a rear-view camera regardless of age or brand.
2. What is the time required to set up a rear-view camera?
Typically, it takes between 1-3 hours, depending on the level of your expertise and the degree of difficulty involved in the installation.
3. Do rear-view cameras function in the late at night?
Sure, they do. Most have night vision or low-light capabilities to ensure a clear nighttime view.
4. Is a wireless or wired camera superior?
Wired cameras have more stability, whereas wireless cameras are simpler to set up. Select based on your needs.
5. Does installing a camera cause a void on my car's warranty
It's not likely to. However, if you are unsure, make sure to check with your vehicle's manufacturer or the dealer first.