How to Install Security Cameras: A Complete DIY Guide
Share
Introduction Install Security Cameras
At present, it's important to have security cameras. It'sn't just a nice thing; it's essential. With the increasing concern about the security of your property, theft of packages, and home intruders, Installing the security camera of your choice will provide security and peace. The question is, what are the best ways to install the security camera? The process might appear daunting at first, especially for those who aren't experienced with technology. The good news is that this step-by-step guide will help you understand the essentials you need to know.
No matter if you're planning to install an electronic system or a wireless one, outdoors or indoors, the guide will cover everything from planning and the selection of equipment to setup, troubleshooting and best methods. Let's explore the world of security camera installation for DIY.
Step 1: Plan Your Security Camera System
1.1 Assess Your Property
Begin by walking around your property or home. Find vulnerable areas like:
- Doors to the front and back
- Ground-floor windows
- Garage or driveway
- Backyard
- Side entrances
- Stairways and hallways (indoors)
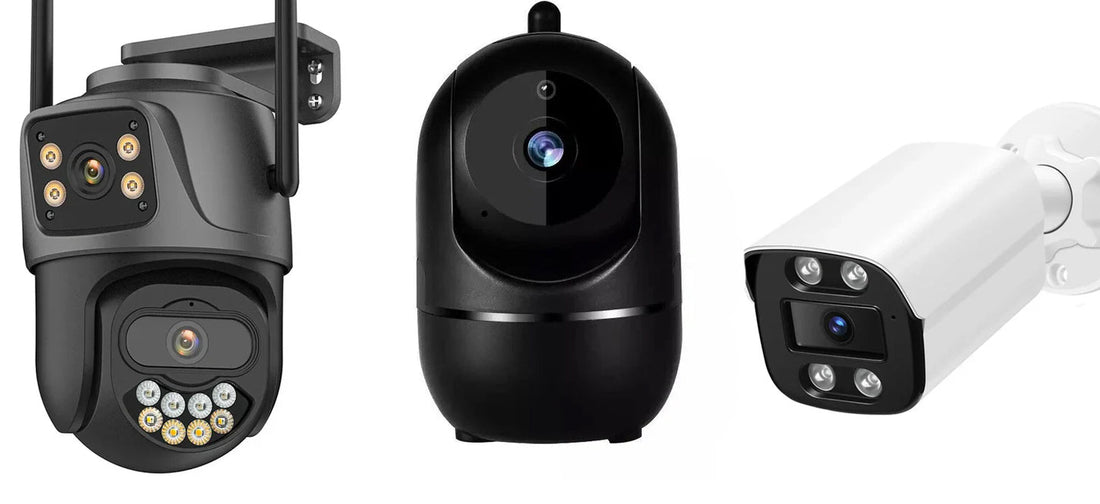
1.2 Decide on the Type of Cameras
Based on your requirements and your environment, you can choose from:
- Wired cameras are Ideal and reliable for permanent installations; they require professional cabling.
- Wireless cameras are Easy to install; however, they require WiFi as well as battery/power sources.
- Indoor and Outdoor Cameras The outdoor versions are weatherproof, while indoor versions are smaller and less noticeable.
1.3 Determine the Number of Cameras Needed
Based on the size of your property as well as risk areas, determine the number of cameras you require. A typical home will have between 4 and 8 cameras.
Step 2: Choose the Right Equipment
2.1 Camera Features to Look For
Make sure your cameras have the following:
- Resolution High (1080p or more)
- The night-vision or infrared light sources
- Wide-angle lens (110deg-160deg)
- Motion detection
- Audio two-way (optional)
- Cloud storage or local storage
- Smartphone app access
2.2 Buy a DVR/NVR System or Cloud-Based Camera
- DVR (Digital Video Recorder): For analog wired cameras.
- NVR (Network Video Recorder): For IP-based wireless or wired cameras.
- Cloud-based cameras The camera stores video in the cloud, with simple remote access.
2.3 Storage Options
- Local (DVR/NVR hard drives)
- Cloud storage (monthly subscriptions are available)
- SD card (built-in some wireless cameras)
Step 3: Gather the Tools You'll Need
Before you start, gather the tools you need:
- Drills and bits
- Screwdrivers
- Wire puller or fish tape (for Wired configurations)
- Anchors and screws
- Coaxial or Ethernet cables (for cables that are wired)
- Ladder
- Laptop or smartphone (for camera setup)
Step 4: Decide Camera Placement
4.1 Outdoor Cameras
Cameras should be mounted at an altitude of (8-10 feet) with a slight downward inclination. Cover:
- Driveways
- Entrances
- Garage
- Backyard paths, side paths
4.2 Indoor Cameras
Place them in the the corners of spaces, with doors and areas that are frequented by people, such as:
- Living room
- Hallways
- Doors for entry
- Rooms for children or nurseries (for monitoring)
4.3 Avoid These Mistakes
- Be careful not to point directly at lighting sources (sun or lights)
- Do not block the lens with walls or trees
- Don't put cameras up excessively high or
Step 5: Install the Cameras
5.1 Mount the Camera
- Make use of the mounting bracket and drill holes where necessary.
- Install wall anchors, if needed.
- Fix the camera using screws.
- Make adjustments to the angle by hand.
5.2 Connect the Camera
- Wireless Systems Conduct cables through ceilings or walls to connect the NVR or DVR.
- Wireless Systems: The camera is powered by a battery or an outlet nearby.
5.3 Connect to Power
Connect the camera to make sure that it is receiving power. Cover your cables with weatherproof covers to safeguard connections.
Step 6: Set Up and Configure Your System
6.1 Connect to DVR/NVR or Wi-Fi
- Utilize the manufacturer's app or software.
- Make sure your camera is connected to the WiFi internet (for wireless cameras).
- For DVR systems, Connect the recorder to a monitor through HDMI.
6.2 Adjust Camera Settings
- Set recording preferences (24/7, motion detection, schedule).
- Create alerts and notifications on your email or phone.
- Update firmware for improved efficiency and safety.
6.3 Test the System
- Explore the coverage zones.
- Be sure that your cameras are recording clear images both day and night.
- Watch live feeds as well as stored footage.
Step 7: Monitor and Maintain Your System
7.1 Regular Monitoring
- Check footage regularly.
- Respond to any alerts.
- Make sure to share your clips with authorities when you need to.
7.2 Maintenance Tips
- Cleanse your lenses regularly using the help of a soft cloth.
- Look for firmware updates.
- Replace batteries if you are using battery-powered units.
- Examine the cables to check for damage every year.
Pros and Cons of DIY Installation
Pros
- Cost-effective
- Full control over camera placement
- Custom-designed system
Cons
- Time-consuming
- The potential for mistakes if they are not handled with care
- It may require technical expertise
Professional vs DIY Installation: Which Is Right for You?
Feature DIY Installation Professional Installation
Cost Low High
Flexibility High Moderate
Time Required: 4-8 hours 1 - 2 hours (by professionals)
Skill Level Needed Moderate None
Warranty/Support Limited Full Support
If you're comfortable with technology and tools, DIY is an option that can pay off. If you're not, hiring a professional could be worth the cost.
Smart Home Integration
Modern security cameras are connected to smart home platforms, such as:
- Amazon Alexa
- Google Home
- Apple HomeKit
The features include:
- Live view controlled by voice
- Automation triggered by the camera (e.g., the lights turn up when movement is sensed)
- Remote access via smart displays
Common Mistakes to Avoid
- Insisting on WiFi Strength A weak WiFi connection causes choppy video. Make use of a WiFi extender when required.
- Poor placement: Do not put it in and then forget about it. Check out some footage prior to deciding it.
- Skipping Updates: Install firmware updates to improve protection and efficiency.
- Leaving cables exposed. Make use of conduits or covers to cover wires, particularly outside.
Legal Considerations When Installing Cameras
- Privacy laws Do not document areas that are expected to be private (e.g., bathrooms, neighbor's property).
- Consent Certain regions require that other regions be informed that a recording has been made.
- Audio recording The law may be different in the area in which you are in effect; make sure you are aware of local regulations.
Display signs that signal surveillance is not only ethical, but also helps stop criminals from doing it.
Top Security Camera Brands
- Kifflo: Wireless, smart-home compatible
- Ring Doorbells and outdoor cameras
- Nest Google-powered intelligent features
- Reolink is High-resolution and affordable
- Swann is Excellent for DVR-based, wired systems
- Lorex: Enterprise-grade quality
Pick based on price connectivity, features, and budget required.
Costs Involved in DIY Security Camera Installation
Expense TypeAverage Cost
Camera Units (per cam) $50-$200
DVR/NVR System $150-$500
Cloud Subscription $3-$30/month
Mounting Supplies $10-$50
Optional Tools $30-$100
A complete system for a medium-sized house generally ranges from $300 to $800 for DIY installation.
Conclusion
Security cameras are no longer reserved for tech experts or experienced installers. With today's easy-to-install system and clear setup instructions, everyone can safeguard their business or home effectively. If you choose an all-wired system or a smaller wireless solution, an installed camera system provides more than footage; it also provides peace of mind.
Follow the steps in this article, avoiding the common mistakes, and you'll be able to secure your space without spending a fortune or calling the experts. Protect your space and be in control of your security today.
FAQs
1. Are there security cameras I can install myself? Do I need to hire a professional?
With the latest wireless technology, anyone with a basic set of tools and an internet connection can do it.
2. How do security cameras should be placed?
Usually between 8 and 10 feet to ensure that they are not tampered with and also capture a wide angle.
3. Do I require WiFi for every security camera?
wireless systems require WiFi. Wireless systems are wired and do not require WiFi in order to work.
4. What security cameras will I require for my home?
houses require between 4 and 8 cameras for driveways, entrances, and even interior spaces.
5. Security cameras can record without internet
Yes, local storage systems such as NVR and DVR record video without the Internet. However, remote access requires the internet.